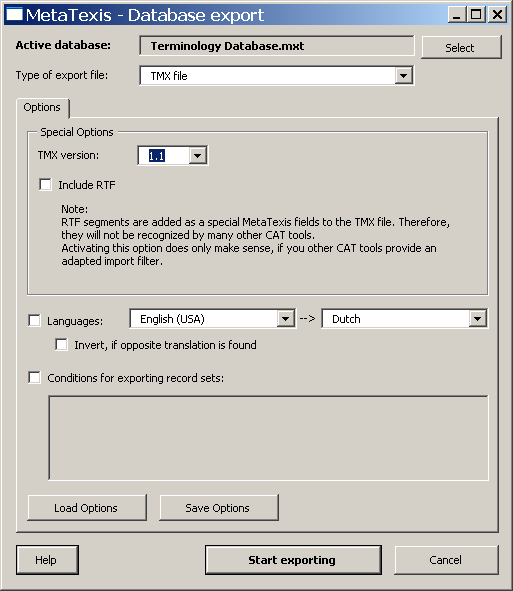
When you have clicked on the Export button in the Import/export dialog box or in the Database center dialog box, the Database export dialog box will be presented to you:
The upper part of this dialog box shows the active database to be exported. You can select another database by clicking on the Select button.
The type of export file can be defined by selecting a type in the Type of export file drop-down-box (default: TMX file).
The main element of the dialog box is a multi-page element with two tabs:
· Options:
The Options tab consists of three parts.
The options in the upper part of the tab change according to the export type selected:
▪ TMX file:
If TMX file is selected as type of export file, the following options are visible:
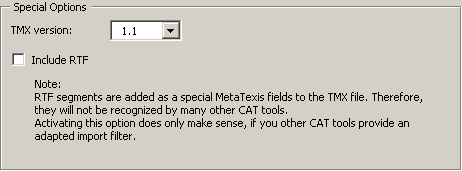
In the drop down box TMX version you can select the TMX version. Two versions are available: 1.1, and 1.4. The most CAT tools are able to import version 1.1. If you select 1.4, make sure that the target program can import this format.
If Include RTF is active, any RTF text is also be included in the TMX file. However, currently this field is not supported by other CAT tools. Check this check box only when you are sure that another CAT tool is able to import this field.
▪ Text file:
If Text file is selected as type of export file, the following options are visible:
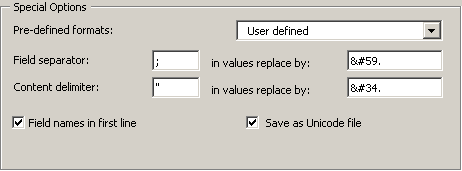
For the Text file type you can define the field separator and the content delimiter. In this format each paragraph contains one data set, and the fields are separated through a field separator. Moreover, a text delimiter can be defined which has the function of a "bracket" for the values in the field.
To make sure that field separator and text delimiter are recognized correctly they must be replaced by other characters in the field values. You can define these replacements according to the requirement of the program which will import the files. By default, the replacements are automatically produced according to the XML specifications for special characters.
The easiest thing to do is to select one of the pre-defined types contained in the Pre-defined formats drop-down-list.
You can choose to have the field names in the first line of the text file.
By default, text files are saved as Unicode files. In the most cases it is strongly recommended to save in the Unicode format to make sure that all characters are correctly saved and can be read on any Unicode enabled system. (By now, all important operating systems and word processors are Unicode enabled.)
▪ Access database:
If Access database is selected as type of export file, the following options are visible:
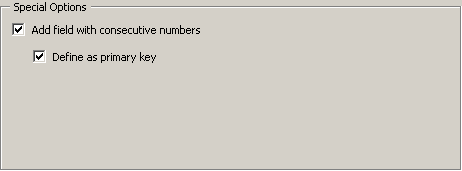
By default, a field with consecutive numbers ("auto increment") is added, and this field is defined as primary key. You can de-activate both options by unchecking the relevant check boxes.
· Languages:
Below the special option you can define languages. If the Languages check box is active, only the TUs with the selected languages will be exported.
Important note: When you want to export TMX files to be imported by other CAT tools than MetaTexis, it is strongly recommend that you activate the Languages check box and define the languages to export. If this is the case, the TMX files produced can also be imported by CAT tools which do not support TMX fully. For example, TRADOS requires the languages to be defined.
If the check box Invert, if opposite language direction is checked, the any TUs with the opposite languages direction will be inverted. Please note: This option is only available for TMX files.
· Conditions:
In the lower part of the dialog you can define conditions for exporting datasets by activating the Conditions for exporting datasets check box (see Import/Export Condition Language).
· Fields:
The Fields tab is only visible for other formats than TMX, and it consists of two list boxes: Available fields and Exported fields plus four buttons in the middle.
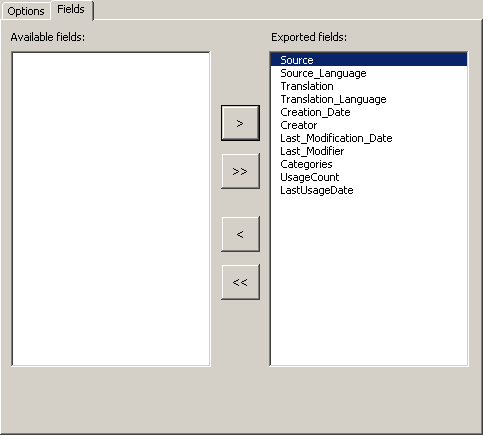
Only those fields which appear in the Exported fields list box are exported. By default all fields are in this list.
You can edit this list by clicking the four buttons in the middle which move the item selected (> and <) or all items (>> and <<).
To start exporting, click on the Start exporting button. A message box informing you about the progress of the exporting process will be shown.
You can stop the exporting process at any time by pressing Esc on the keyboard.
When the exporting process is finished, the Save dialog box is shown. Select a name and click on Save to save the export file.